|
|
|
How to IK Rig a character in Blender |
|

|
A tutorial on how to rig your EB64 models or other N64 models with Inverse Kinematics.
Credits:
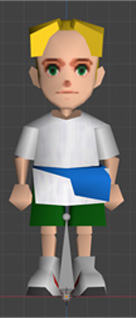
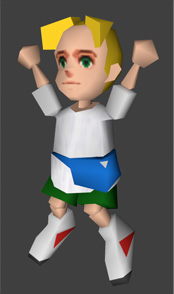
psi64 - Lucas Model
|
|
|
|
|
1. Adding Bones |
|
|
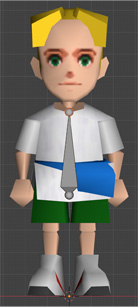
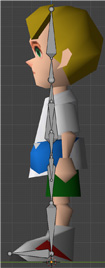
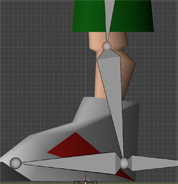
Start by making sure the cursor is at the world origin by pressing shift + s > Cursor to World Origin. In Object Mode, press 1 to switch to the front view and add your first bone by hitting shift + a > Armature. If the bone is too big or too small for the character, use S to scale down to appropriate size.
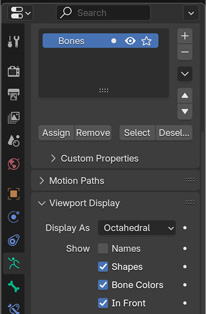
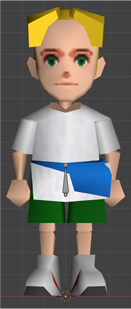
With the bone selected, press tab to switch to edit mode. Before doing anything, with the bone still selected, click the little running man in the toolbar then click the viewport display drop down and make sure ‘In Front’ is checked. This will make it so you can see your rig even when it’s inside the character.
|
|
|
|
|
2. Making The Armature |
|
|
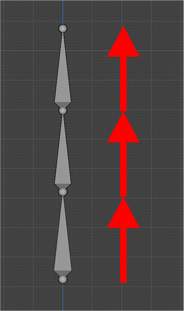
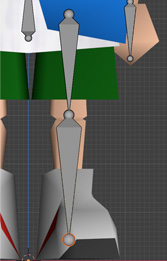
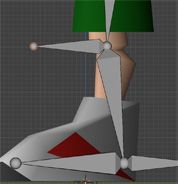
This first bone will be the hip bone. With this bone selected, press G then Z to constrain it to the Z axis. Move the bone up the Z axis so the bottom of the bone sits near the bottom of your character’s pelvis.
Selecting just the ball joints on a bone in edit mode will let you change the length of the bone. Select the ball joint at the top of the hip bone and use G + Z to extend the bone’s length up to the top of the pelvis.
Make sure the bone is pointing up. The thinner end of the bone is the point. It helps to think of bones like arrows that influence each other in pointing order. If you think about your own bones, usually when you turn your hips, your torso, neck and head will turn with them. When you turn your torso, your neck and head move too, and when you turn your neck, your head moves too. Basically a bone in a chain of bones influences all the bones it is pointing to.
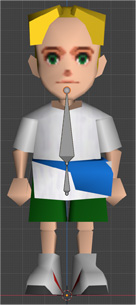
With the joint ball at the top of the hip bone selected, hit E + Z to extrude a new bone on the Z axis. This will be the torso bone. Extend it to just a little above the character’s chin.
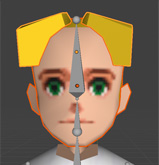
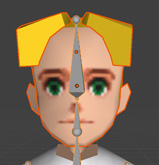
Extrude a neck bone with E + Z halfway up your character’s head then extrude one more bone, a head bone, up to the top of the character’s head.
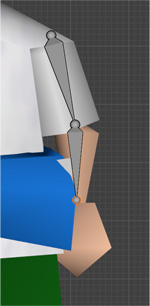
Next, hit shift + A > Armature to create a new bone separate from the others. Select the whole bone and hit R + Y and type ‘180’ to rotate the bone so it points down. This is done because arms and legs influence downward rather than upward like before.
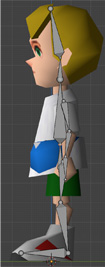
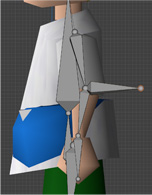
Use the G key to move this bone to the top of your character’s left arm so that the top ball joint touches the top of the arm. Select the bottom ball joint and use the G key to move it so it sits on the top center edge of the elbow.
Press E to extrude a bone and move the new bone so that the bottom ball joint sits above the top center of the hand.
Extrude one more bone with E so that the bottom ball joint sits near the bottom of the hand.
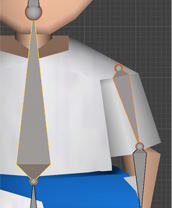
Next, connect the arm to the torso by selecting the bone at the top of the arm then selecting the torso bone and hitting control + P. You will see a line between the bones indicating they are connected.
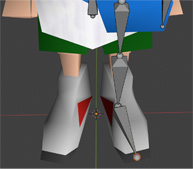
The leg is similar to the arm. Start with a new bone rotated 180 degrees along the Y axis. Move the bone so the top ball joint sits at the top of the leg. Move the bottom ball joint down so it sits above the top edge of the shin.
Extrude another bone and move the bottom ball joint down to the foot.
Press E + Y to extrude a bone along the Y axis that fits the foot (You might need to move the camera to see the bone extruding properly). If your character’s feet stick outward, use the ball joint at the end of the foot to move the bone in line with the foot.
Similar to the upper arm and torso, select the upper leg and hip bone and hit control + P > Keep Offset.
Like with the arm, we need to make sure all the bones are aligned on the side too. Press the 3 key to switch to side view and adjust all the bones so they are aligned properly. Make sure the knee is bent forward a little and the elbow is bent back a little.
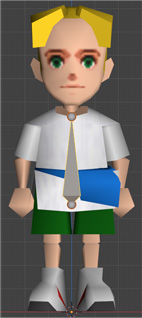
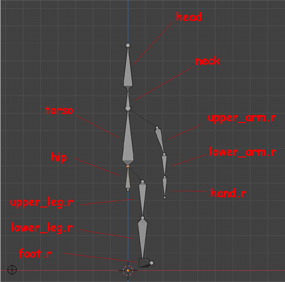
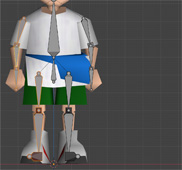
Now is a good time to name all the bones. To name a bone select it then click the bone icon in the toolbar then change the name. For all the arm and leg bones, add .r to the end. You will see why later. The image below shows what you could call all your bones.
|
|
|
|
|
3. Adding IK Reference Bones |
|
|
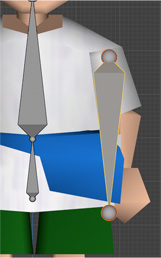
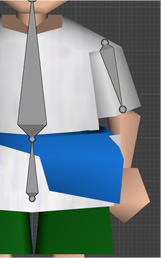
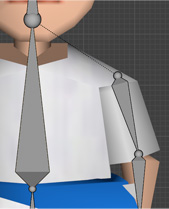
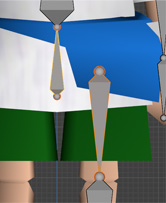
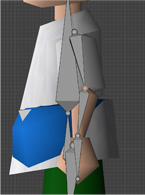
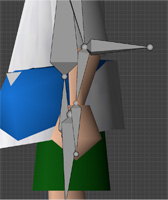
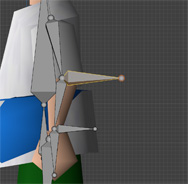
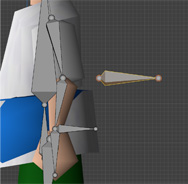
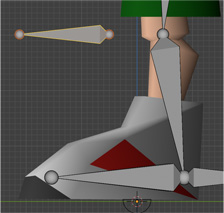
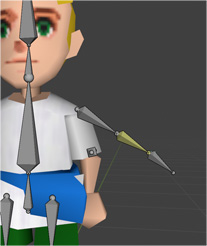
To work, IK needs some reference bones. First press 3 to switch to side view and select the elbow joint ball on the arm. Hit E + Y to extrude back a bone and name it “elbowik.r”.
Do the same for the wrist joint ball and name it “handik.r”.
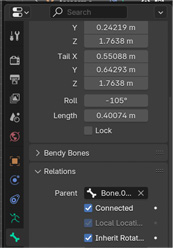
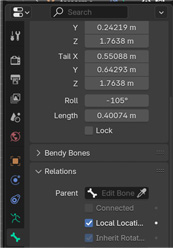
We don’t want these IK bones to be connected to the rest of the armature so with the elbow IK bone selected, go to the bone tab and in the relations drop down menu click the X in the parent field to remove it.
Do the same with the hand IK bone. For only the elbow IK bone, Hit G then Y and move it out a little from the whole arm.
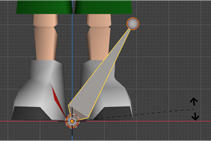
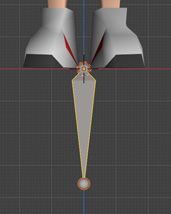
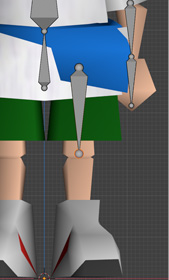
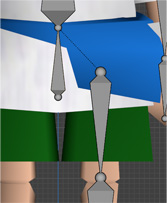
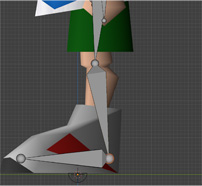
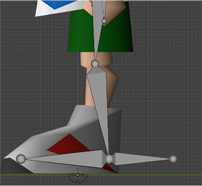
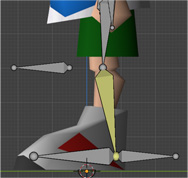
Adding reference bones to the leg is similar. At the ankle ball joint, hit E and then Y to extrude back a bone. Name this bone “footik.r”.
At the knee ball joint, hit E and then Y to extrude forward a bone. Name this bone “kneeik.r”.
Unparent these bones like with the arm IK bones. Similar to the elbow IK bone, move the knee IK bone a little forward from the leg.
|
|
|
|
|
4. Adding Inverse Kinematics |
|
|
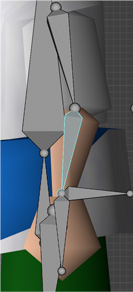
Now to actually add the IK stuff. Switch to Object Mode and select the whole armature. Switch to Pose Mode and select the lower arm bone.
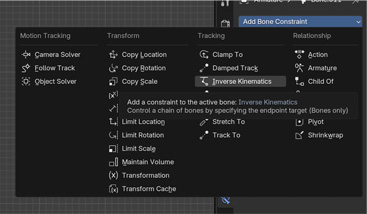
Click Bone Constraints (the blue bone) in the toolbar. Click Add Bone Constraint and select Inverse Kinematics.
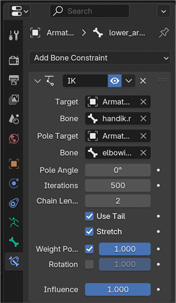
For the target field select the whole armature. For the Bone field select the hand IK reference bone. For the Pole Target field, select the armature again. Finally for the other Bone field, select the elbow IK reference bone. The armature might look messed up while doing this but that’s normal. Set the Chain Length to 2. Play around with the Pole Angle until the armature goes back to normal, usually the right value is -90 degrees or -180 degrees.
Now if you try moving the hand IK bone with G the armature should move! The mesh won’t move yet though because it hasn’t been parented yet.
For the leg the process is the same except the lower leg is selected instead of the lower arm, foot ik instead of hand ik, and knee instead of elbow ik.
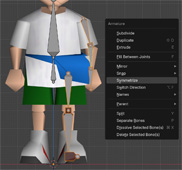
Switch to Edit Mode and select all the arm and leg bones (including IK reference bones). Right click and select symmetrize. The other arm and leg should now have bones. This is because of the ‘.r’ prefix added earlier and all the new bones have a ‘.l’ prefix.
Lastly, parent the bones to the mesh. To do this, switch back to Object Mode. Select the part(s) of the mesh you want to move with a specific bone then select the armature and switch back to Pose Mode.
In Pose Mode, select the bones you want your mesh parts parented to and go control + P > Bone.
Repeat this for the rest of the mesh and your done!
|
|
|
|
|